
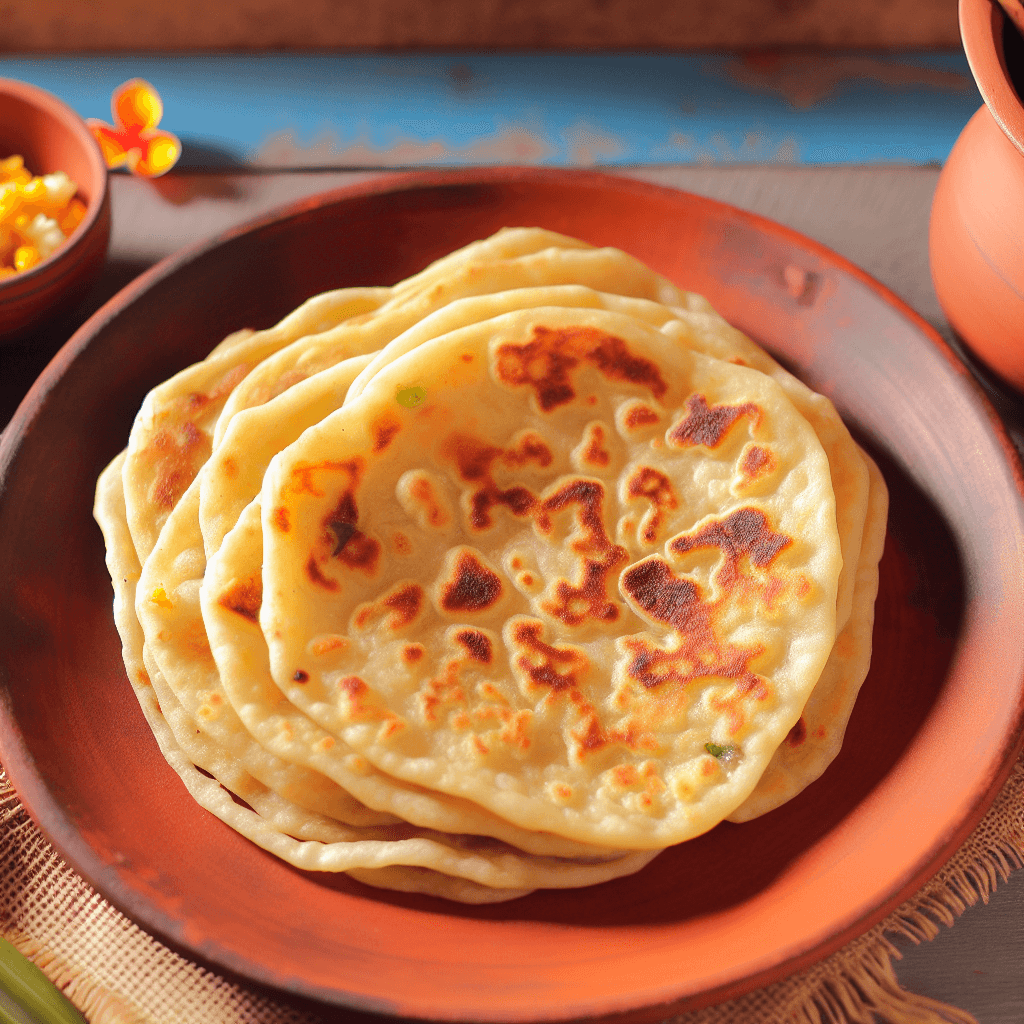
Titiyas
Soft Chamorro corn or flour tortillas cooked on a griddle.
About This Recipe
Titiyas (pronounced tih-TEE-yas) are the traditional flatbread of Chamorro cuisine — the indigenous food culture of Guam and the Commonwealth of the Northern Mariana Islands. Made with either masa harina (nixtamalized corn flour) or all-purpose flour, enriched with coconut milk, and kissed with a touch of sugar, they are cooked on a dry griddle until soft, pliable, and lightly speckled with pale-tan spots from the heat. The result is something softer than a Mexican tortilla but chewier than a flatbread, with a subtle sweetness and a faint coconut fragrance that lingers. Titiyas are the essential table companion in Chamorro cooking — the vessel for kelaguen (grilled chicken cured in lemon and coconut), the starchy backdrop for red rice and barbecue, and the preferred vehicle for chicken kelaguen at fiestas. There are two distinct versions: the corn titiyas (made with masa harina) is heartier with an earthy nixtamal flavour, while the flour titiyas is lighter and chewier, more like a thick flour tortilla, and is currently the most widely made at home and sold commercially on Guam. The technique is simple but the ratios matter: the dough should be soft and just barely sticky — too much flour produces tough, cracker-like titiyas, while too little produces dough that clings to the rolling surface. Coconut milk (preferably full-fat) is the ingredient that distinguishes titiyas from other flatbreads: it enriches the dough, tenderises the gluten slightly, and imparts the characteristic sweetness that makes these flatbreads so moreish. The griddle must be dry and hot — no oil — because adding oil changes the cooking dynamic from gentle steaming to shallow frying, altering the final texture.
Ingredients
Serves 4
- 2 cupsmasa harina (or all-purpose flour)
- 1/2 cupcoconut milk
- 1 tbspsugar
- 1/2 tspsalt
- 2-4 tbspwarm water (as needed)
Instructions
- 1
Combine dry ingredients
Place the masa harina (or all-purpose flour), sugar, and salt in a large mixing bowl and whisk together until evenly distributed. Make a well in the centre.
- 2
Add wet ingredients and mix
Pour the coconut milk into the well and mix with your hands or a fork, bringing the flour from the edges into the centre. Add warm water one tablespoon at a time, mixing after each addition, until the dough just comes together into a soft, pliable ball. The dough should feel like Play-Doh — soft but not sticky enough to coat your palms.
Masa harina absorbs liquid differently than flour — it takes a minute for it to fully hydrate. Give the dough a 2-minute rest after initial mixing before deciding if more water is needed.
- 3
Rest the dough
Form the dough into a ball, cover the bowl with a damp kitchen towel or plastic wrap, and rest for 10 minutes at room temperature. This rest period allows the masa or flour to fully hydrate and the gluten (in flour titiyas) to relax, making rolling much easier and the final texture more tender.
- 4
Divide and shape
Divide the dough into 8 equal pieces (about 50 g each) and roll each into a smooth ball. Working on a lightly floured surface (or between two sheets of cling film), press or roll each ball into a round about 15–16 cm in diameter and 2–3 mm thick. They do not need to be perfectly round — slight irregularity is authentic.
A tortilla press wrapped in plastic sheeting makes shaping fast and consistent, but a rolling pin and two sheets of plastic wrap work equally well.
- 5
Heat the griddle
Heat a dry cast-iron skillet, comal, or heavy non-stick pan over medium heat for 2–3 minutes until a drop of water flicked onto the surface bounces and evaporates immediately. No oil is used — a dry, hot surface is what creates the characteristic light speckle pattern on the titiyas surface.
- 6
Cook the titiyas
Place one titiyas in the dry pan. Cook for 60–90 seconds on the first side — you will see the edges begin to look dry and the surface start to puff in small bubbles. Flip and cook for another 60 seconds on the second side until you see small brown speckles and the titiyas is cooked through but still soft and pliable. Adjust heat if they're browning too quickly.
- 7
Keep warm and serve
Stack the cooked titiyas on a plate and wrap in a clean kitchen cloth or foil to keep them soft and warm — stacking creates gentle steam that keeps them pliable. Serve warm alongside kelaguen, red rice, or Chamorro barbecue. Titiyas should be soft enough to fold and scoop without cracking.
Did you make this?
Rate it and help other cooks find the recipes that actually work.
One tap to sign in, and we'll save the rating you just picked.
Everything you need to plan your week — free
- Meal calendar
- Grocery list
- AI recipe ideas
Cook this hands-free
Get AI meal plans, step-by-step cooking mode, and your saved recipes in the free Bento app.
Pro Tips
- →
Do not over-cook — titiyas are done the moment they are cooked through and still soft; a few pale-tan speckles are desirable, but deep browning produces dryness.
- →
Use full-fat coconut milk, not coconut cream or 'light' versions — the fat is what tenderises the dough and gives titiyas their characteristic slight richness.
- →
If the dough keeps cracking when you roll it, it is too dry — add warm water a teaspoon at a time and knead it in. Masa harina in particular benefits from being slightly more hydrated than you think necessary.
- →
A tortilla press (available at Latin grocery stores for under $20) makes this recipe very quick — press, flip, repeat.
- →
Leftover titiyas reheat beautifully on a dry pan for 30 seconds per side, or wrapped in a damp paper towel in a microwave for 15 seconds.
Variations
- •
Flour titiyas (softer, chewier): replace masa harina with 2 cups of all-purpose flour — this is the most commonly made version on Guam today and is slightly more tender with a subtler flavour.
- •
Desiccated coconut version: add 3 tablespoons of desiccated coconut to the dough for visible coconut pieces and a more pronounced coconut flavour — popular at fiestas.
- •
Sweet titiyas: increase sugar to 3 tablespoons and add 1/4 teaspoon of vanilla extract for a dessert-style titiyas eaten with butter and honey.
- •
Gluten-free: use certified gluten-free masa harina (most masa harina is naturally gluten-free, but verify the brand) and stick to the corn version — it is inherently gluten-free.
Storage
Titiyas keep well wrapped in foil or a sealed bag at room temperature for 1 day. Refrigerate for up to 3 days, keeping them wrapped tightly so they do not dry out. Reheat on a dry hot pan for 30–45 seconds per side to restore softness, or microwave wrapped in a damp paper towel for 15 seconds. Titiyas freeze excellently for up to 2 months — stack with parchment paper between each one and seal in a freezer bag; thaw at room temperature for 10 minutes then reheat on a dry pan.
History & Origin
Titiyas are one of the few foods that genuinely predate the Spanish colonisation of Guam in 1668. Ancient Chamorros had been grinding and cooking grains into flat cakes on hot stones for centuries before European contact — these early versions used indigenous grains before corn was introduced. The word 'titiyas' is itself believed to be a Chamorro adaptation of the Spanish 'tortilla', reflecting the linguistic and culinary exchange of the colonial period. Over 350 years, titiyas evolved into their current distinct form: enriched with local coconut milk (not the Spanish lard or water found in Mexican tortillas), slightly sweetened, and associated exclusively with the Chamorro cultural identity rather than Spanish food culture.
Frequently Asked Questions
Is masa harina the same as cornmeal or corn flour?
No — masa harina is distinctly different from regular cornmeal or corn flour. It is made from dried corn kernels that have been nixtamalized (soaked and cooked in an alkaline solution of limewater), then dried and ground. This process transforms the corn's flavour, nutrition, and texture dramatically. Regular cornmeal or corn flour will not produce the same result and cannot substitute directly.
Can I freeze titiyas?
Yes — titiyas freeze exceptionally well. Stack cooled titiyas with small squares of parchment or wax paper between each to prevent sticking, place in a freezer-safe bag, and freeze for up to 2 months. To serve, remove from the freezer and let thaw at room temperature for 10 minutes, then reheat on a dry hot pan for 30 seconds per side.
Why do my titiyas crack when I fold them?
Cracking almost always means the dough was too dry or the titiyas were overcooked. For the dough: add warm water a teaspoon at a time until it is soft and pliable with no surface cracking when pressed. For cooking: remove from the pan while still soft and slightly underdone-looking — they continue to set slightly from residual heat, and keeping them wrapped in cloth while warm maintains their flexibility.
Can I make titiyas ahead for a party?
Yes — cook titiyas the day before, let cool completely, stack with parchment paper between each, and wrap tightly in foil. Reheat the entire stack in a 150 °C oven for 10–12 minutes wrapped in foil, or reheat individually on a dry pan. They soften beautifully with any reheating method.
Nutrition Facts
Per serving (100g / 3.5 oz) · 4 servings total
Time Summary
Have Questions?
Ask our AI cooking assistant anything about this recipe — substitutions, techniques, scaling.
Chat with AI Chef →Featured in Guides
This recipe is featured in the following curated guides:
More Micronesian Recipes
You Might Also Like
Similar dishes from other cuisines around the world.
Free Kitchen Tools
Calculators and converters that pair with this page — no signup needed.
Put This Into a Plan
Schedule it, shop for it, and track what you already have.
Read Next
Longer reads that go deeper on the ideas behind this dish.
Community
Join the conversation
Sign in to leave a comment and save your favourite recipes